It's Saturday morning,
hubby is off to softball practice with our daughter and
the youngest son has a friend over.
So, what's a mom to do?
Start reupholstering our dining room chairs, of course.
A year ago last February, a friend gave me a dining room set.
She had it in her basement in storage for like 5 years.
It belonged to her ex in-laws and when she moved from her house, she gave it to me.
We have been looking at dining room sets for about 15 years but hadn't found anything we really liked.
We just love the pieces that our friend gave us; and you just can't beat the price of FREE.


According to my friend, it's about 50 years old and was moved down here from New York several years ago. It has been protected very well and is in great condition.
It has 6 chairs, a china hutch and a rolling sidebar with fold-down sides.
It's been great for Thanksgiving and Christmas dinners.
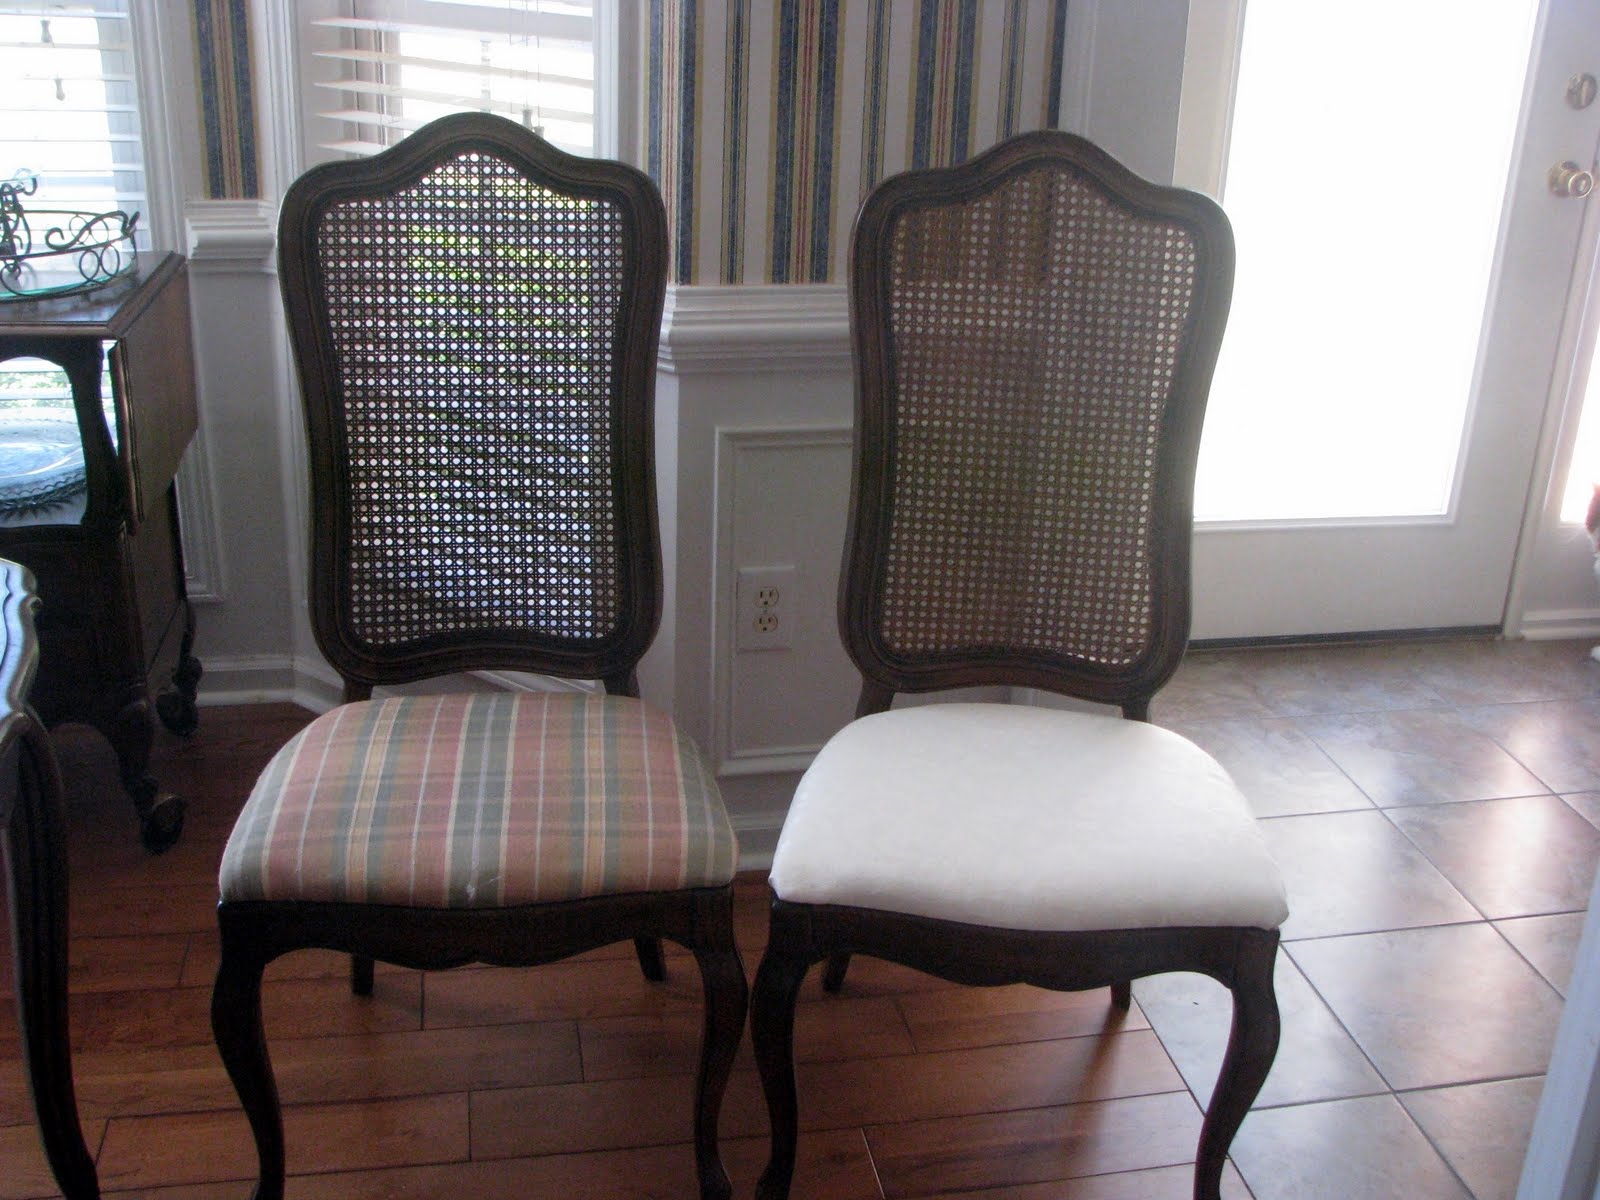
The material on the chairs is in good shape but it's just not my style. It looks a little "country" to me. I like my dining room to have a more formal look.
When I was visiting my mother the end of July, we were going through her material and I found a huge piece of fabric that would be perfect for the chairs. I brought it home, hoping to get to this project very soon.
Last saturday seemed like a great day to do that; so I jumped right in.
Now, keep in mind that I have never ever ever reupholstered anything before. My hubby is so handy though that I just get started and know that he can bail me out if need be. :)
This is the first chair I started on.
As you can see, the material is in good shape.


I started by turning the chair over on the table to take out the screws.
Or, what I figured would be screws but, they were actually these.
I personally have never seen these screw type things before.

They were very easy to get out and I was able to remove the entire seat.

The underside of the seat was also in great condition.

The hardest part was removing all these staples.

I think that part took me almost an hour.
Once I finished removing the staples and took off the old material, I laid out the new material to cut my pattern.


I just laid the old material over the new material and used it as a pattern. I just made sure to cut the material plenty big enough.

I laid the now naked seat onto the new fabric

And then after much pulling and stapeling (and purchasing a new staple gun) and my hubby helping me with the corners, which were really tricky, we finally got the first seat covered.


And here is the finished chair.
I love it.
The transformation makes it look formal and it fits in with our decorating style a little better.

Here is a side-by-side; the old chair and the new chair.
Which do you like better?

Now I just need to get busy and finish the other 5 chairs.
Hope I can get them done before Thanksgiving.
I'm linking up with Beth at Home Stories A to Z

What a nice change! LOVE the chairs and looking for some just like them to mix with my dining room table. I hope Craig's List comes through soon! Good job!
ReplyDeleteThank you Jennifer. This really was a pretty easy project to do. I hope Craig's List comes through for you soon, too!
ReplyDelete